If maintained properly during use, a Musashi knife can be used for a very long time. On the other hand, if the knife is not stored properly and regular maintenance is neglected, the knife can lose its sharpness, rust, and last for a shorter time, and if clumsy while cutting up ingredients, it could even lead to an unexpected injury.
Knife maintenance is easy once you learn the tricks, so please try it out for yourself.
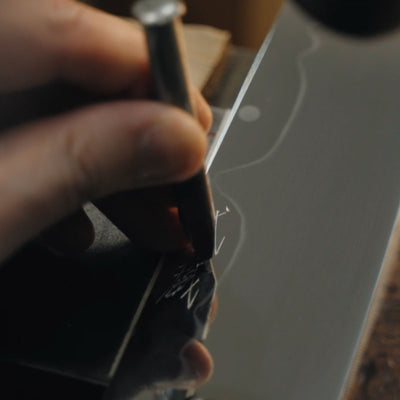
Resurrect the Cutting Ability of Your Knife Through Sharpening
A well-maintained knife that cuts well not only presents cuisine beautifully and brings out the best in your ingredients, it also influences the taste deeply, and encourages safe use, because ingredients will be cut up just as you intend.
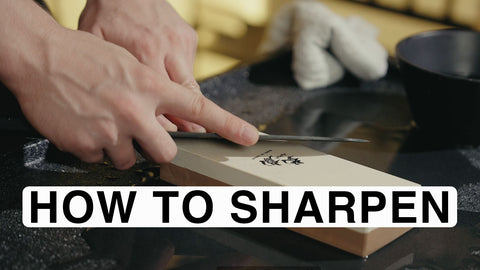
To maintain a sharp cutting ability to the end, regularly sharpen the blade using a whetstone.
Sharpening a Japanese Knife (Single-Edged Knife)
The sharpening methods differ between Japanese knives, which are generally single-edged, and Western knives, which are double-edged.
This section describes how to sharpen a single-edge Japanese knife.
(1) The knife
(2) Whetstones
*There are three types of whetstone, a rough whetstone, medium whetstone and a finishing whetstone.
(3) A container in which to immerse the whetstones
(4) A towel or other cloth
*As the cloth is spread out under the whetstone to prevent the whetstone from slipping during use, use a cloth that you don't mind getting dirty
<Preparation before sharpening>
1
When you feel that your knife does not cut as well during daily use, sharpen your knife using a medium whetstone and finishing whetstone, in that order. If the blade has become blunt or developed nicks, first form a rough shape using the rough whetstone, and then sharpen using a medium whetstone following by a finishing whetstone.
Start by placing the reverse side of the blade flatly on the medium whetstone and sharpen several times. Sharpening sludge will form.
When sharpening a single-edged blade, start sharpening from the reverse side and repeat the process of reverse side > face side > reverse side > face side until the edge is formed (sharpen at a 7:3 ratio: sharpening the face side around 7 times and the reverse side around 3 times). This is done to prevent a phenomenon where the blade ends up brittle from the reverse side overhanging when only the face side is sharpened. Regardless of which whetstone is used, please finish with sharpening the reverse side and eventually return to normal blade position.
*While small amounts of water are occasionally added during sharpening, as the blade is sharpened by the grain of the whetstone, avoid washing away the sharpening sludge except when using the finishing whetstone.
2
When sharpening sludge forms, flip the blade over to the face side, hold the blade against the whetstone from the blade ridges to the edge, and sharpen by sliding the blade from the tip towards the heel.
The hand holding the handle of the knife is referred to as the gripping hand, while the hand guiding the knife is referred to as the sharpening hand. Grip the handle firmly with one hand, with the sharpening hand holding down the knife at a point as close as possible to the part of the blade you wish to sharpen. This is because the greatest amount of force is applied to under the fingers of the sharpening hand.
3
After several sharpening strokes, run the ball of your finger along the side of the blade. If you feel it catch, that is referred to as "burr," and signifies that an edge has formed.
The trick to sharpening well is to take the time to sharpen the knife slowly, without cutting corners.
Until you become familiar with the process, don't rush; check your progress as many times as needed.
4
Sharpen the reverse side of the knife several times to remove the burr.
5
Once the burr has been removed, wash away the sharpening sludge and smooth out the entire blade using a finishing whetstone.
6
Finally, lift up a little bit then place the tip of the knife touches to the whetstone, and sharpen the beveled edge for few times. This process is called “Kobadome” and helps to finish with a strong edge.
7
After carefully washing the newly sharpened knife in hot water and thoroughly wiping away the moisture with a dry cloth, it is recommended that you apply an oil coating, wrap the knife in plastic or similar material and store it in a place with minimal moisture.
8
Use a tool for plane correcting to make the surface of the whetstone flat again. If sharpening at home, rubbing the whetstone against the reverse side of another whetstone or on a flat concrete surface is the easiest way.
Important Points When Sharpening a Knife
●When touching the blade directly, take care not to cut yourself.
●If you sharpen the blade too thinly, the blade will develop nicks and the cutting edge will lose its sharpness.
●When you start using the knife, use it with care as the blade will be thin. When a knife is sharpened several times in the course of use, it will develop a thickness.